I claim no credit for this hack, I stumbled across this fix HERE. I decided to make this blog because, for whatever reason, the photos that the original poster “Imperial Death Star” posted were dead links. Of course, subsequently the pics have come back up but since I took photos of my fix, I thought I might as well go ahead and post them.
The problem of this roll resistor failing seems to be a very common and replacement through the dealer or repair shop involves replacing the entire aluminum bracket that contains the rubber bushing. This repair will run you between $275 and $600 depending on where you have it done….BUT, you can order a Volvo part and with a few minutes of modification and 30 minutes of your time, you can complete this fix for under $10!
So here we go:
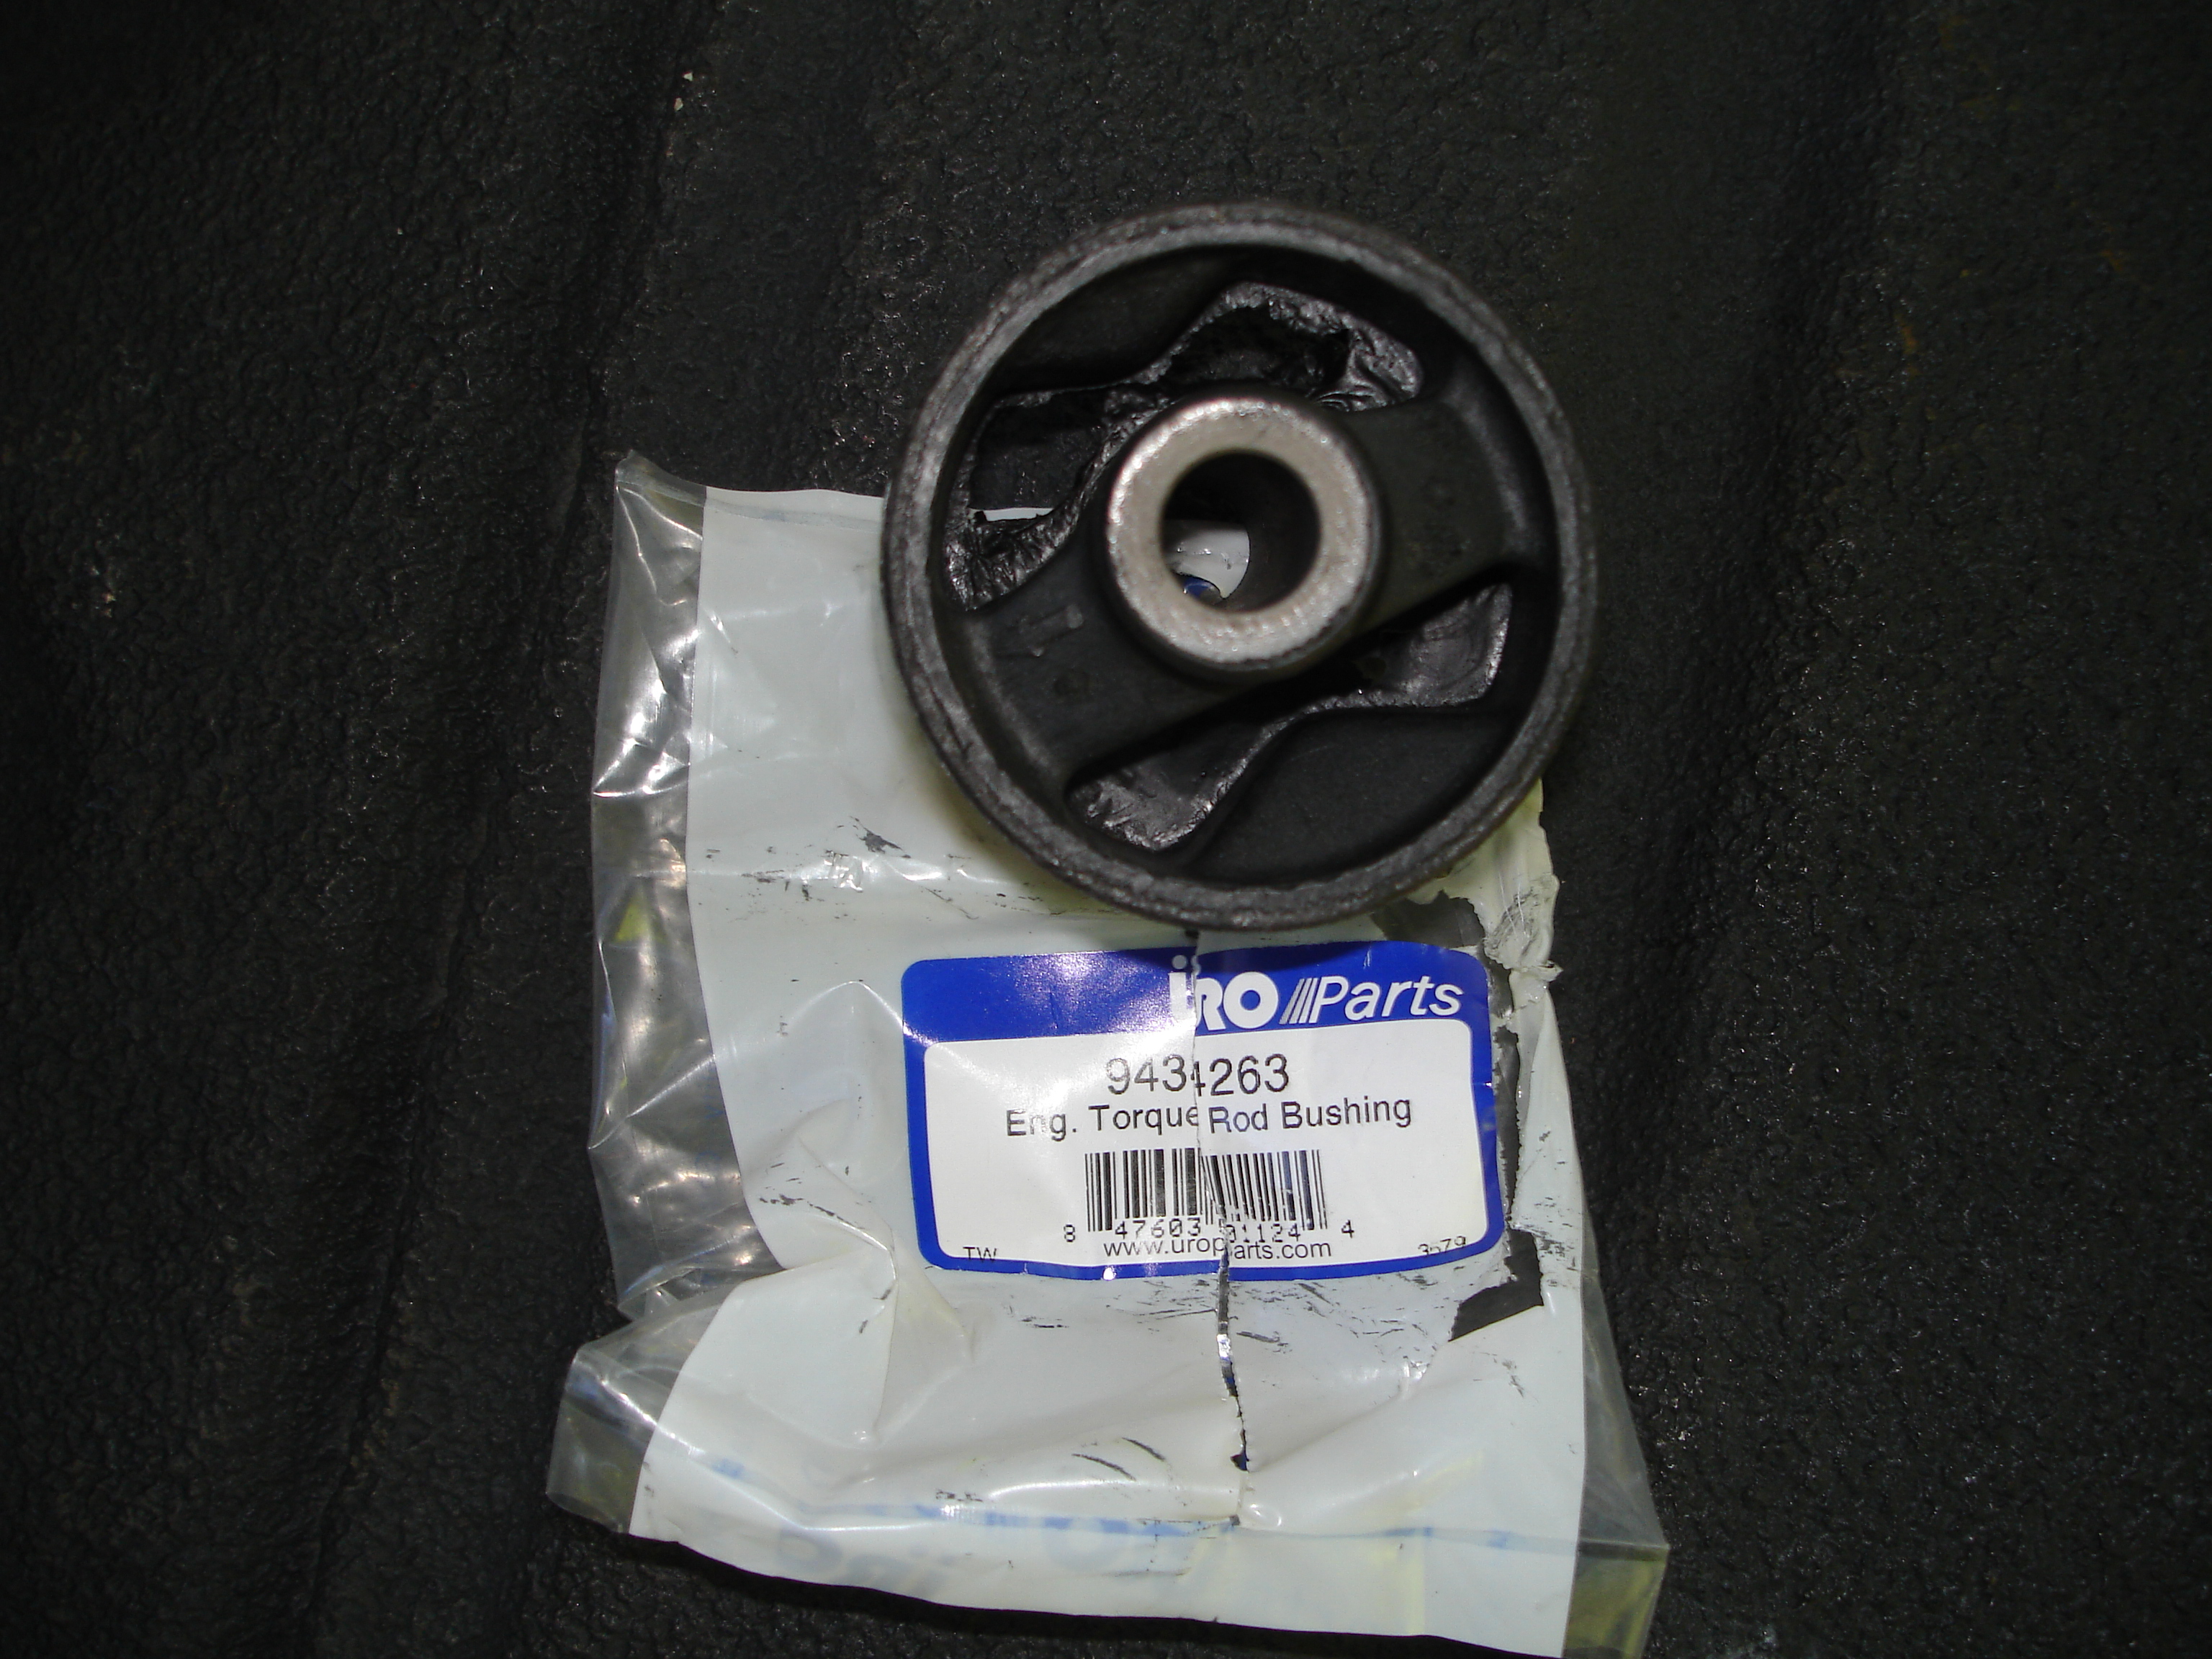
1. Get the part – I found this on Amazon for $6.12 (with free 2 day shipping w/ Amazon Prime), there are several places you can find the part but here is an Amazon link. If you want to look elsewhere the part number and description are: Volvo -9434263 Engine Torque Rod Bushing.
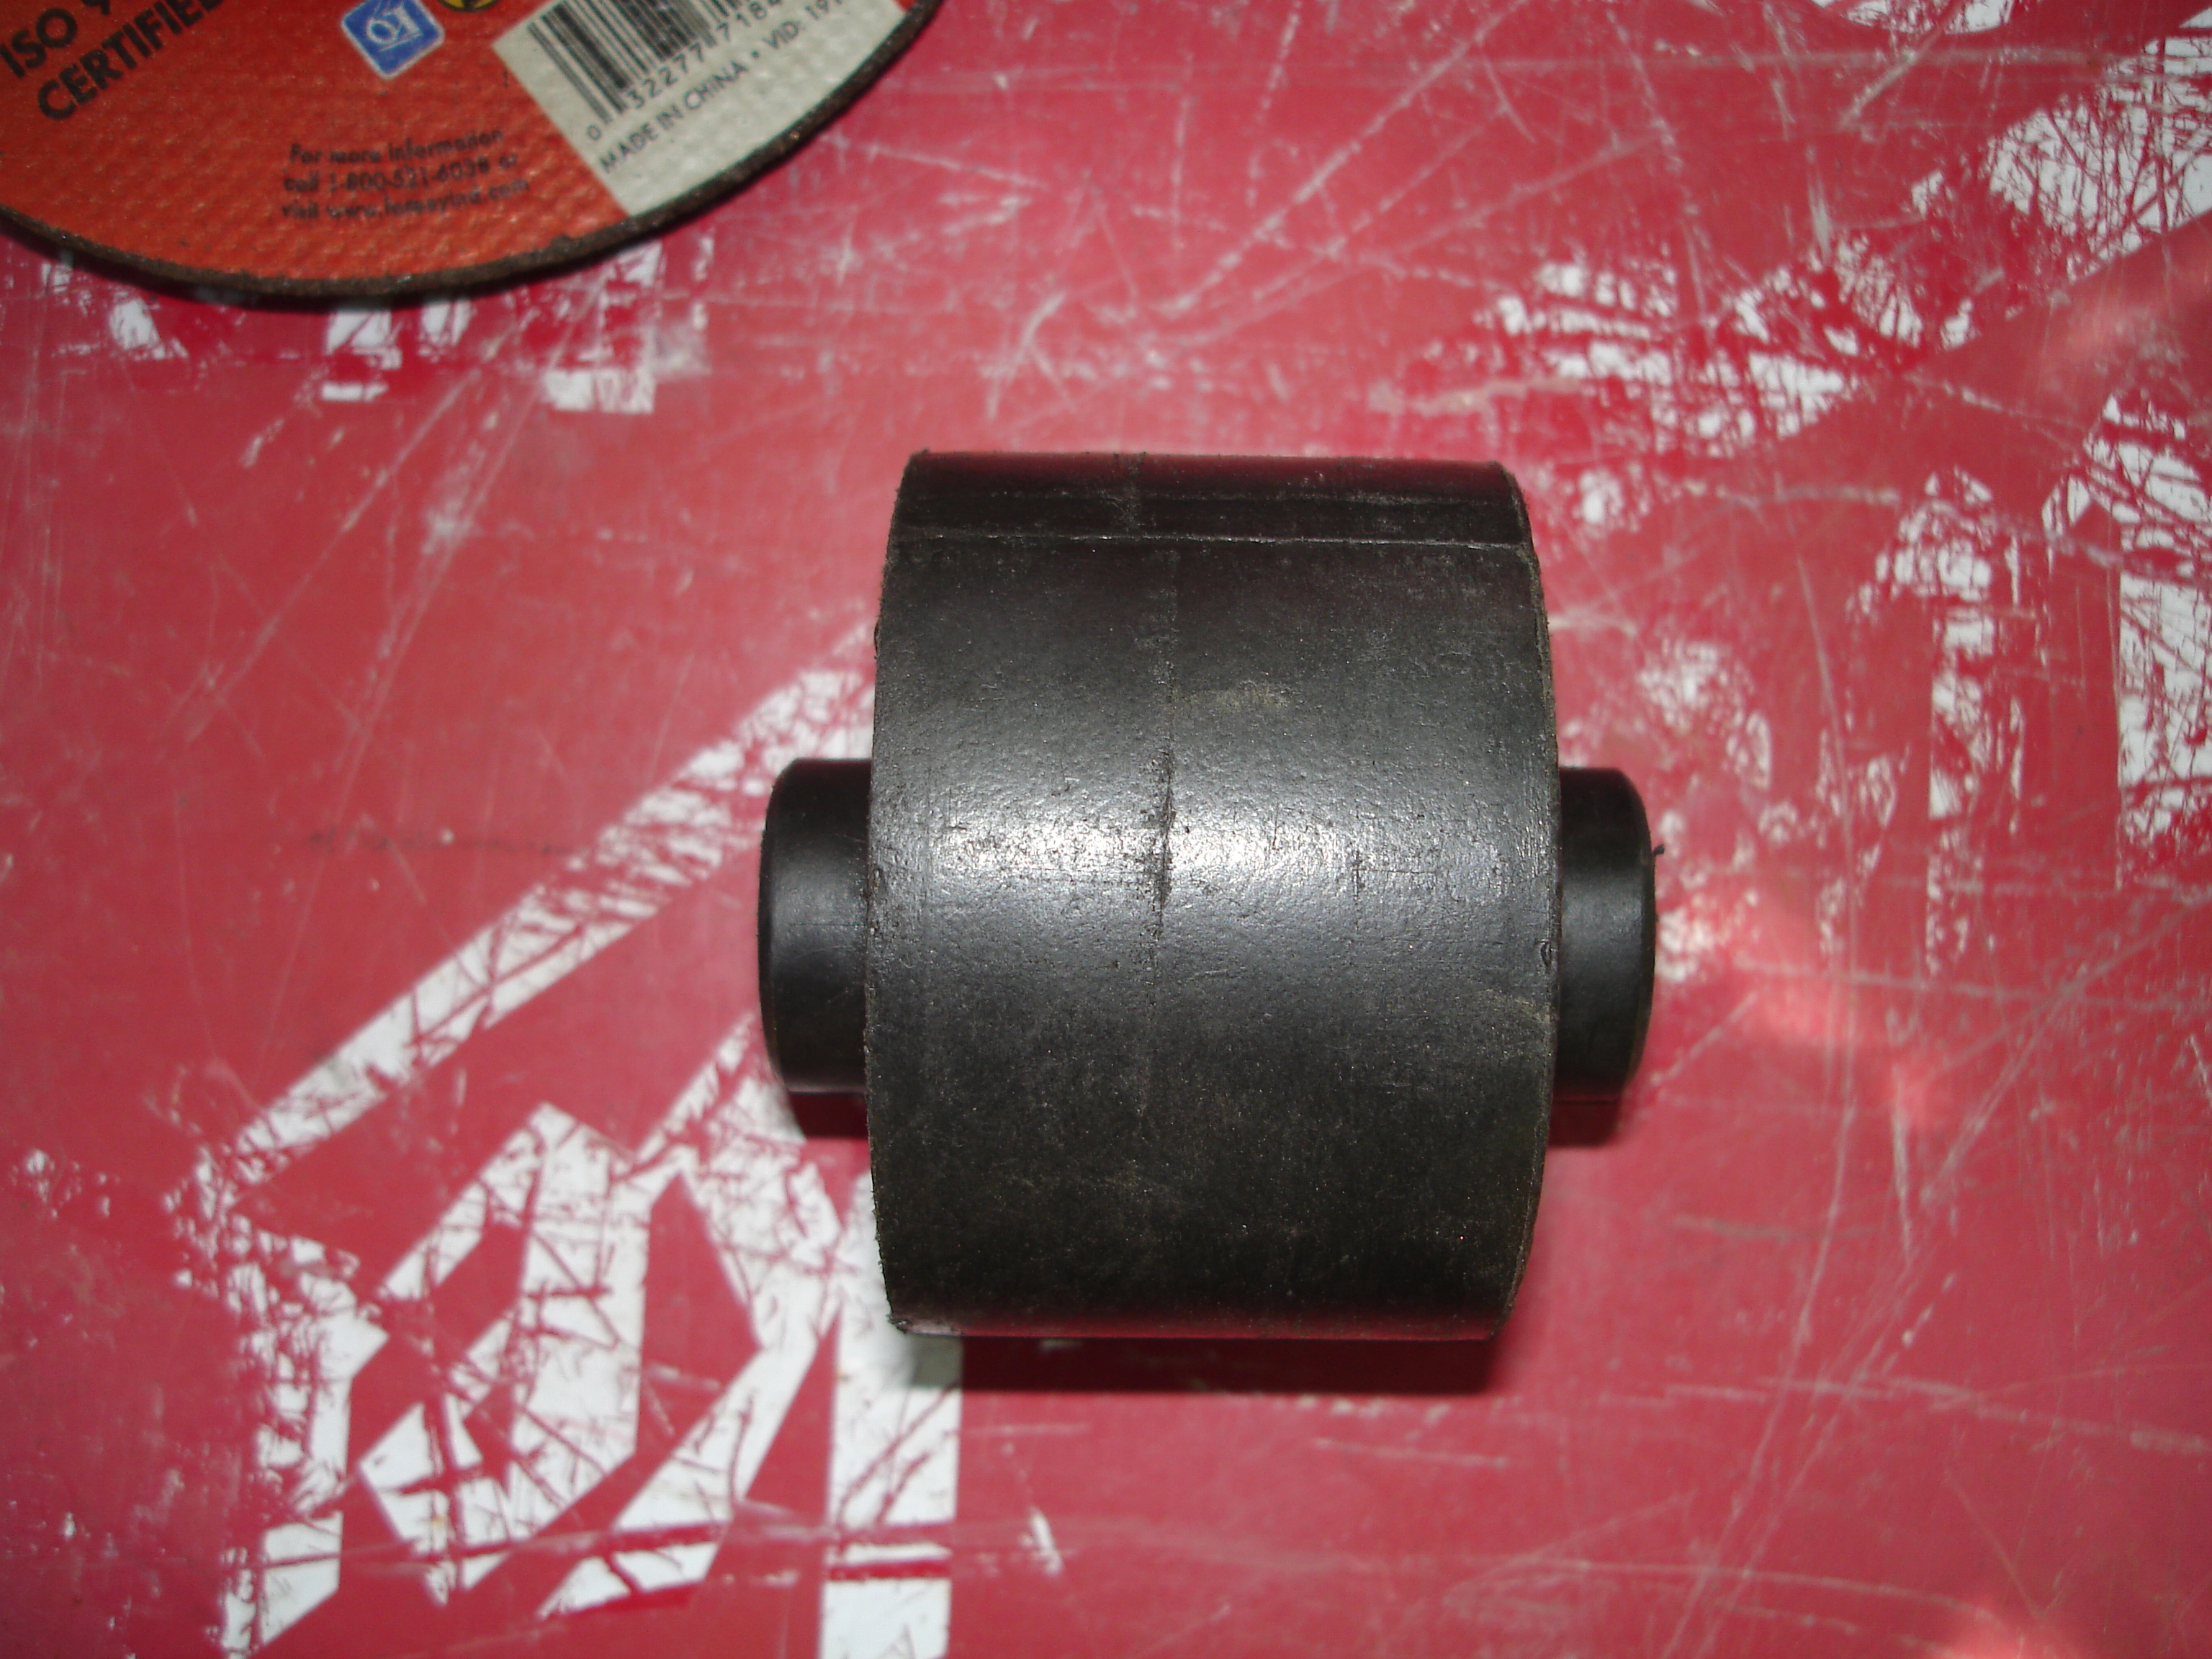
2. Modify the part – The part that you get has a metal sleeve which a bolt slides through to hod the mount in place. The problem is that the ends of this sleeve sticks out past the edges of the motor mount and they have to be trimmed off in order for the part to fit in the bracket in the Freestyle.
Trimming these ends can be done in a number of ways….I have a pipe cutting stand which has a chain vise that held the mount firmly in place but I have read in the Ford Freestyle blog (linked above) about people using a regular vice or even two pairs of needle nosed Vice Grips. You need to come up with some way to hold the part very firmly so you can cut it.
.

You can use any metal cutting implement that you have at your disposal. I used an angle grinder with a 4″ metal cutting blade which cut through this piece like a hot knife through butter…about 60-90 seconds per side. I have read about people using a hacksaw which would work but a sawzall or bandsaw would be quicker and easier.
Here are a couple of views from the finished product.


3. Install your modified part
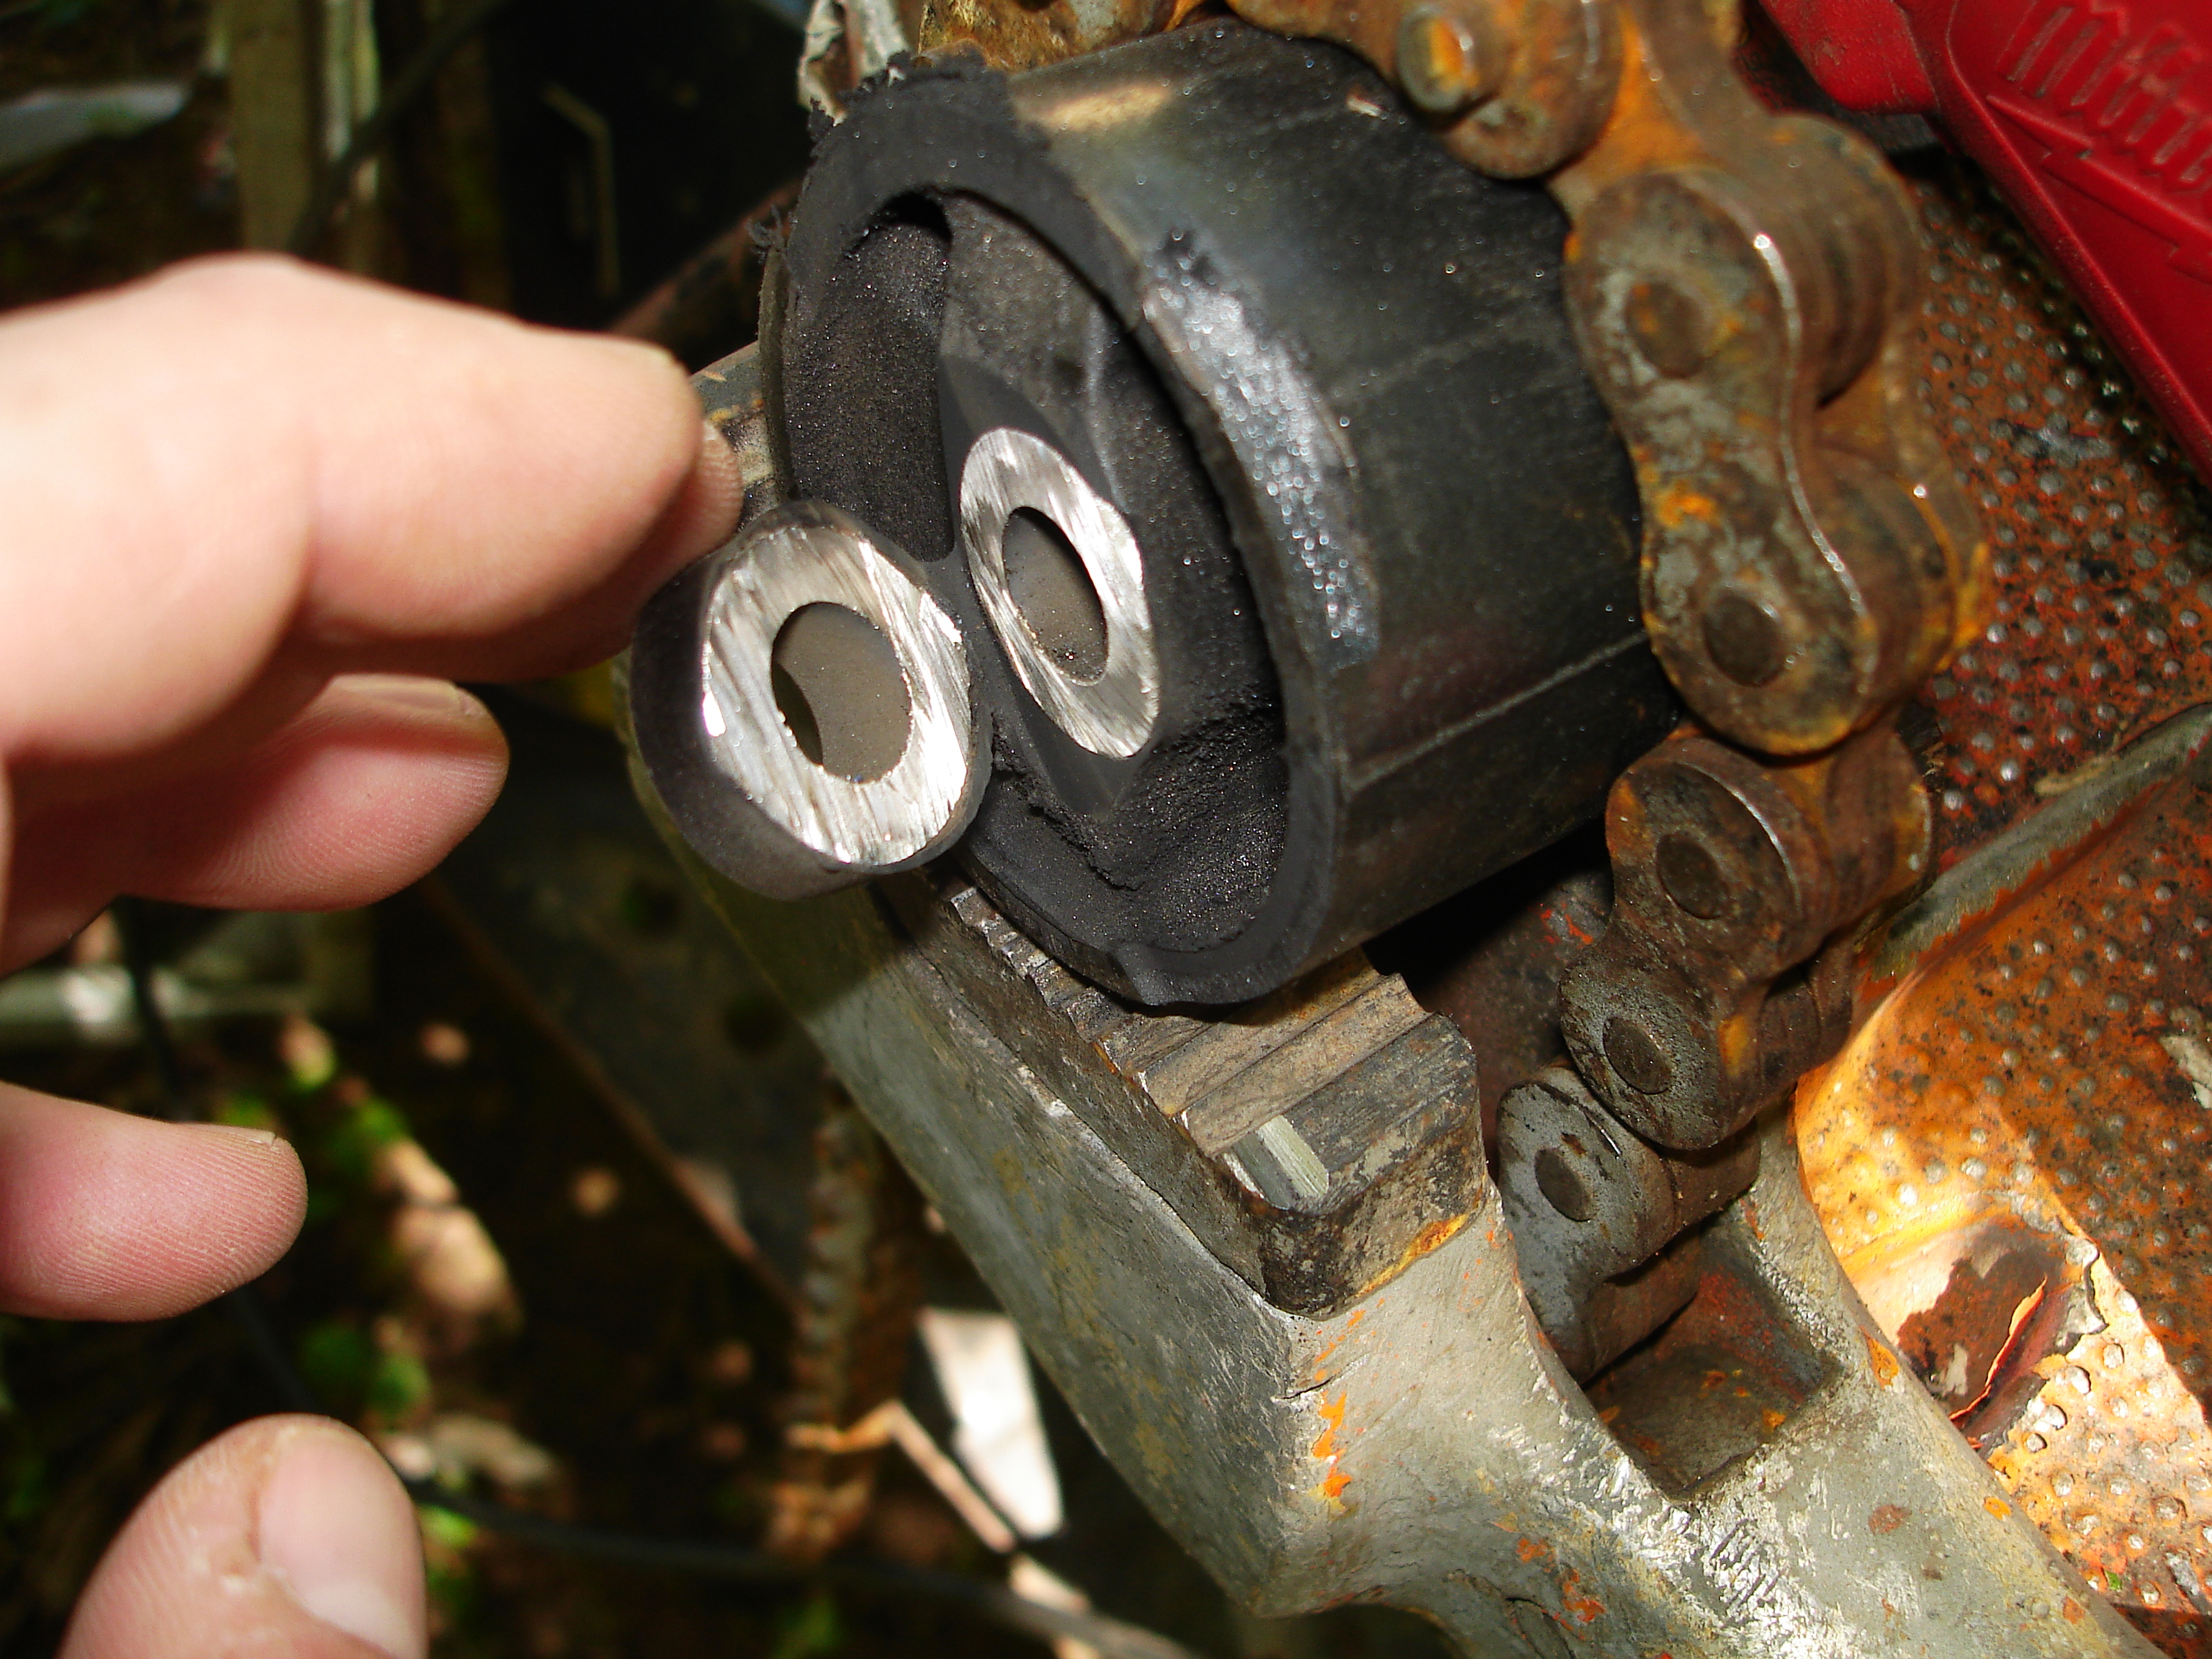
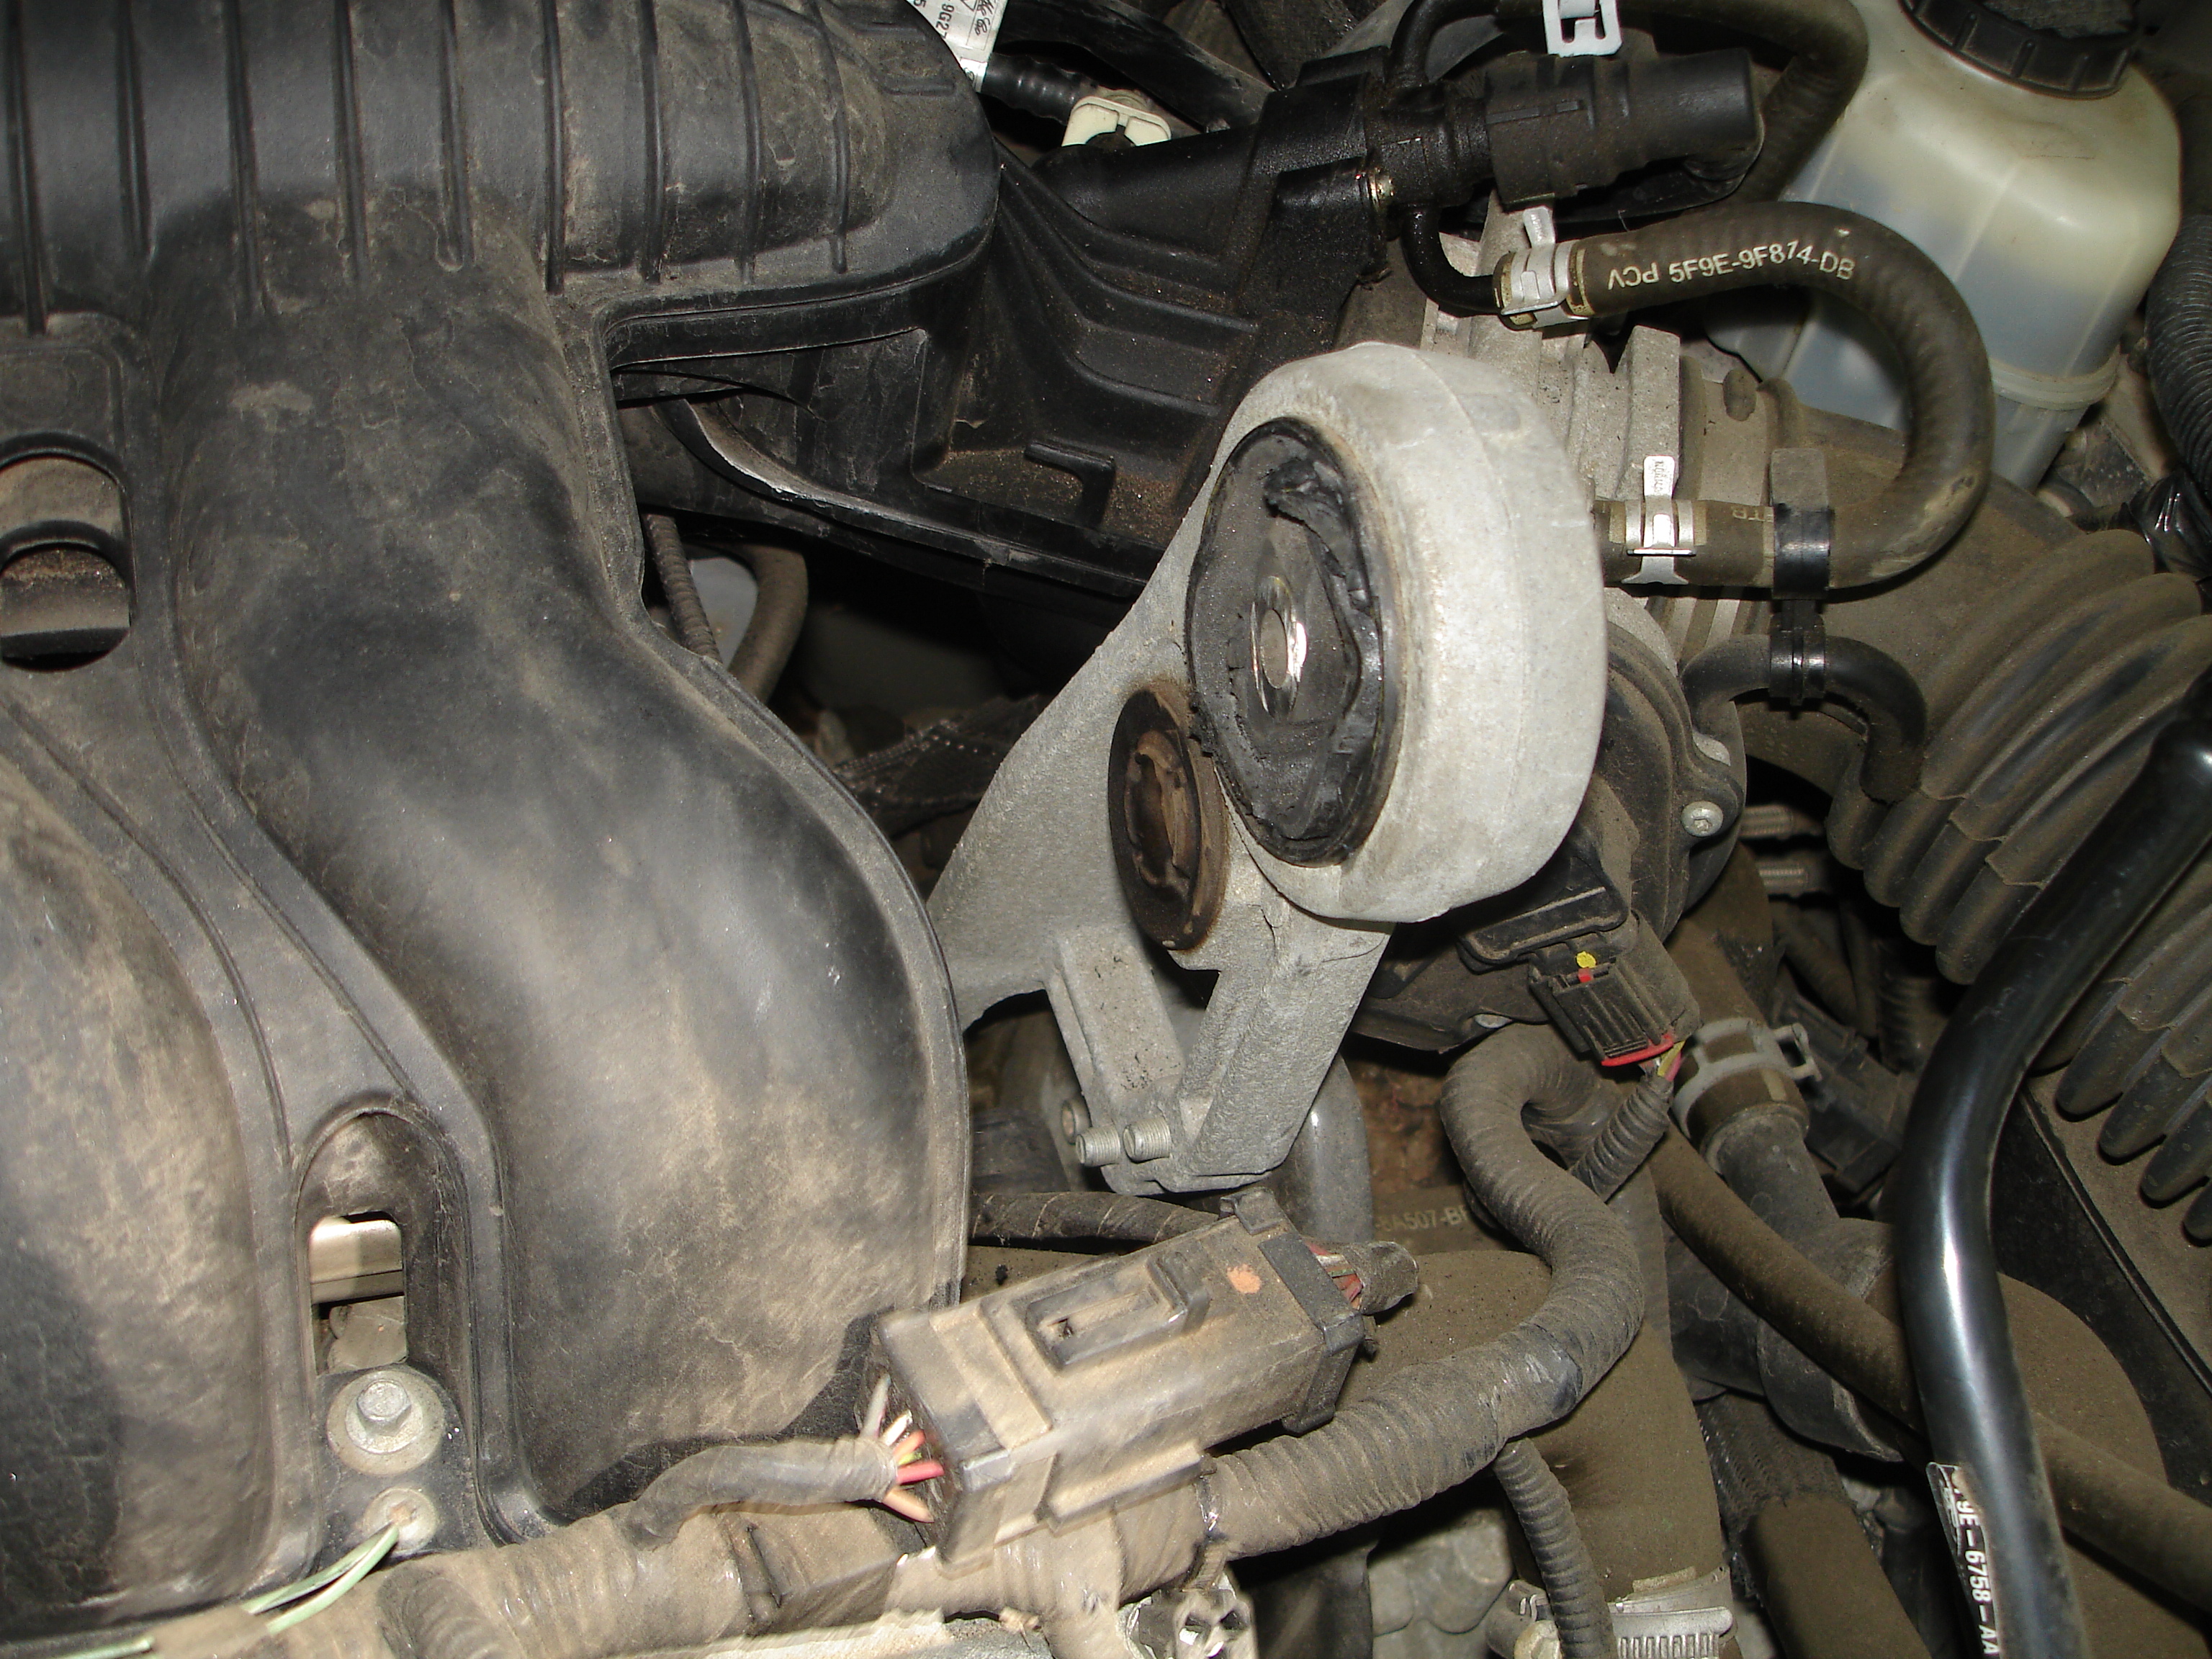
Here you can see the broken rubber bushing.

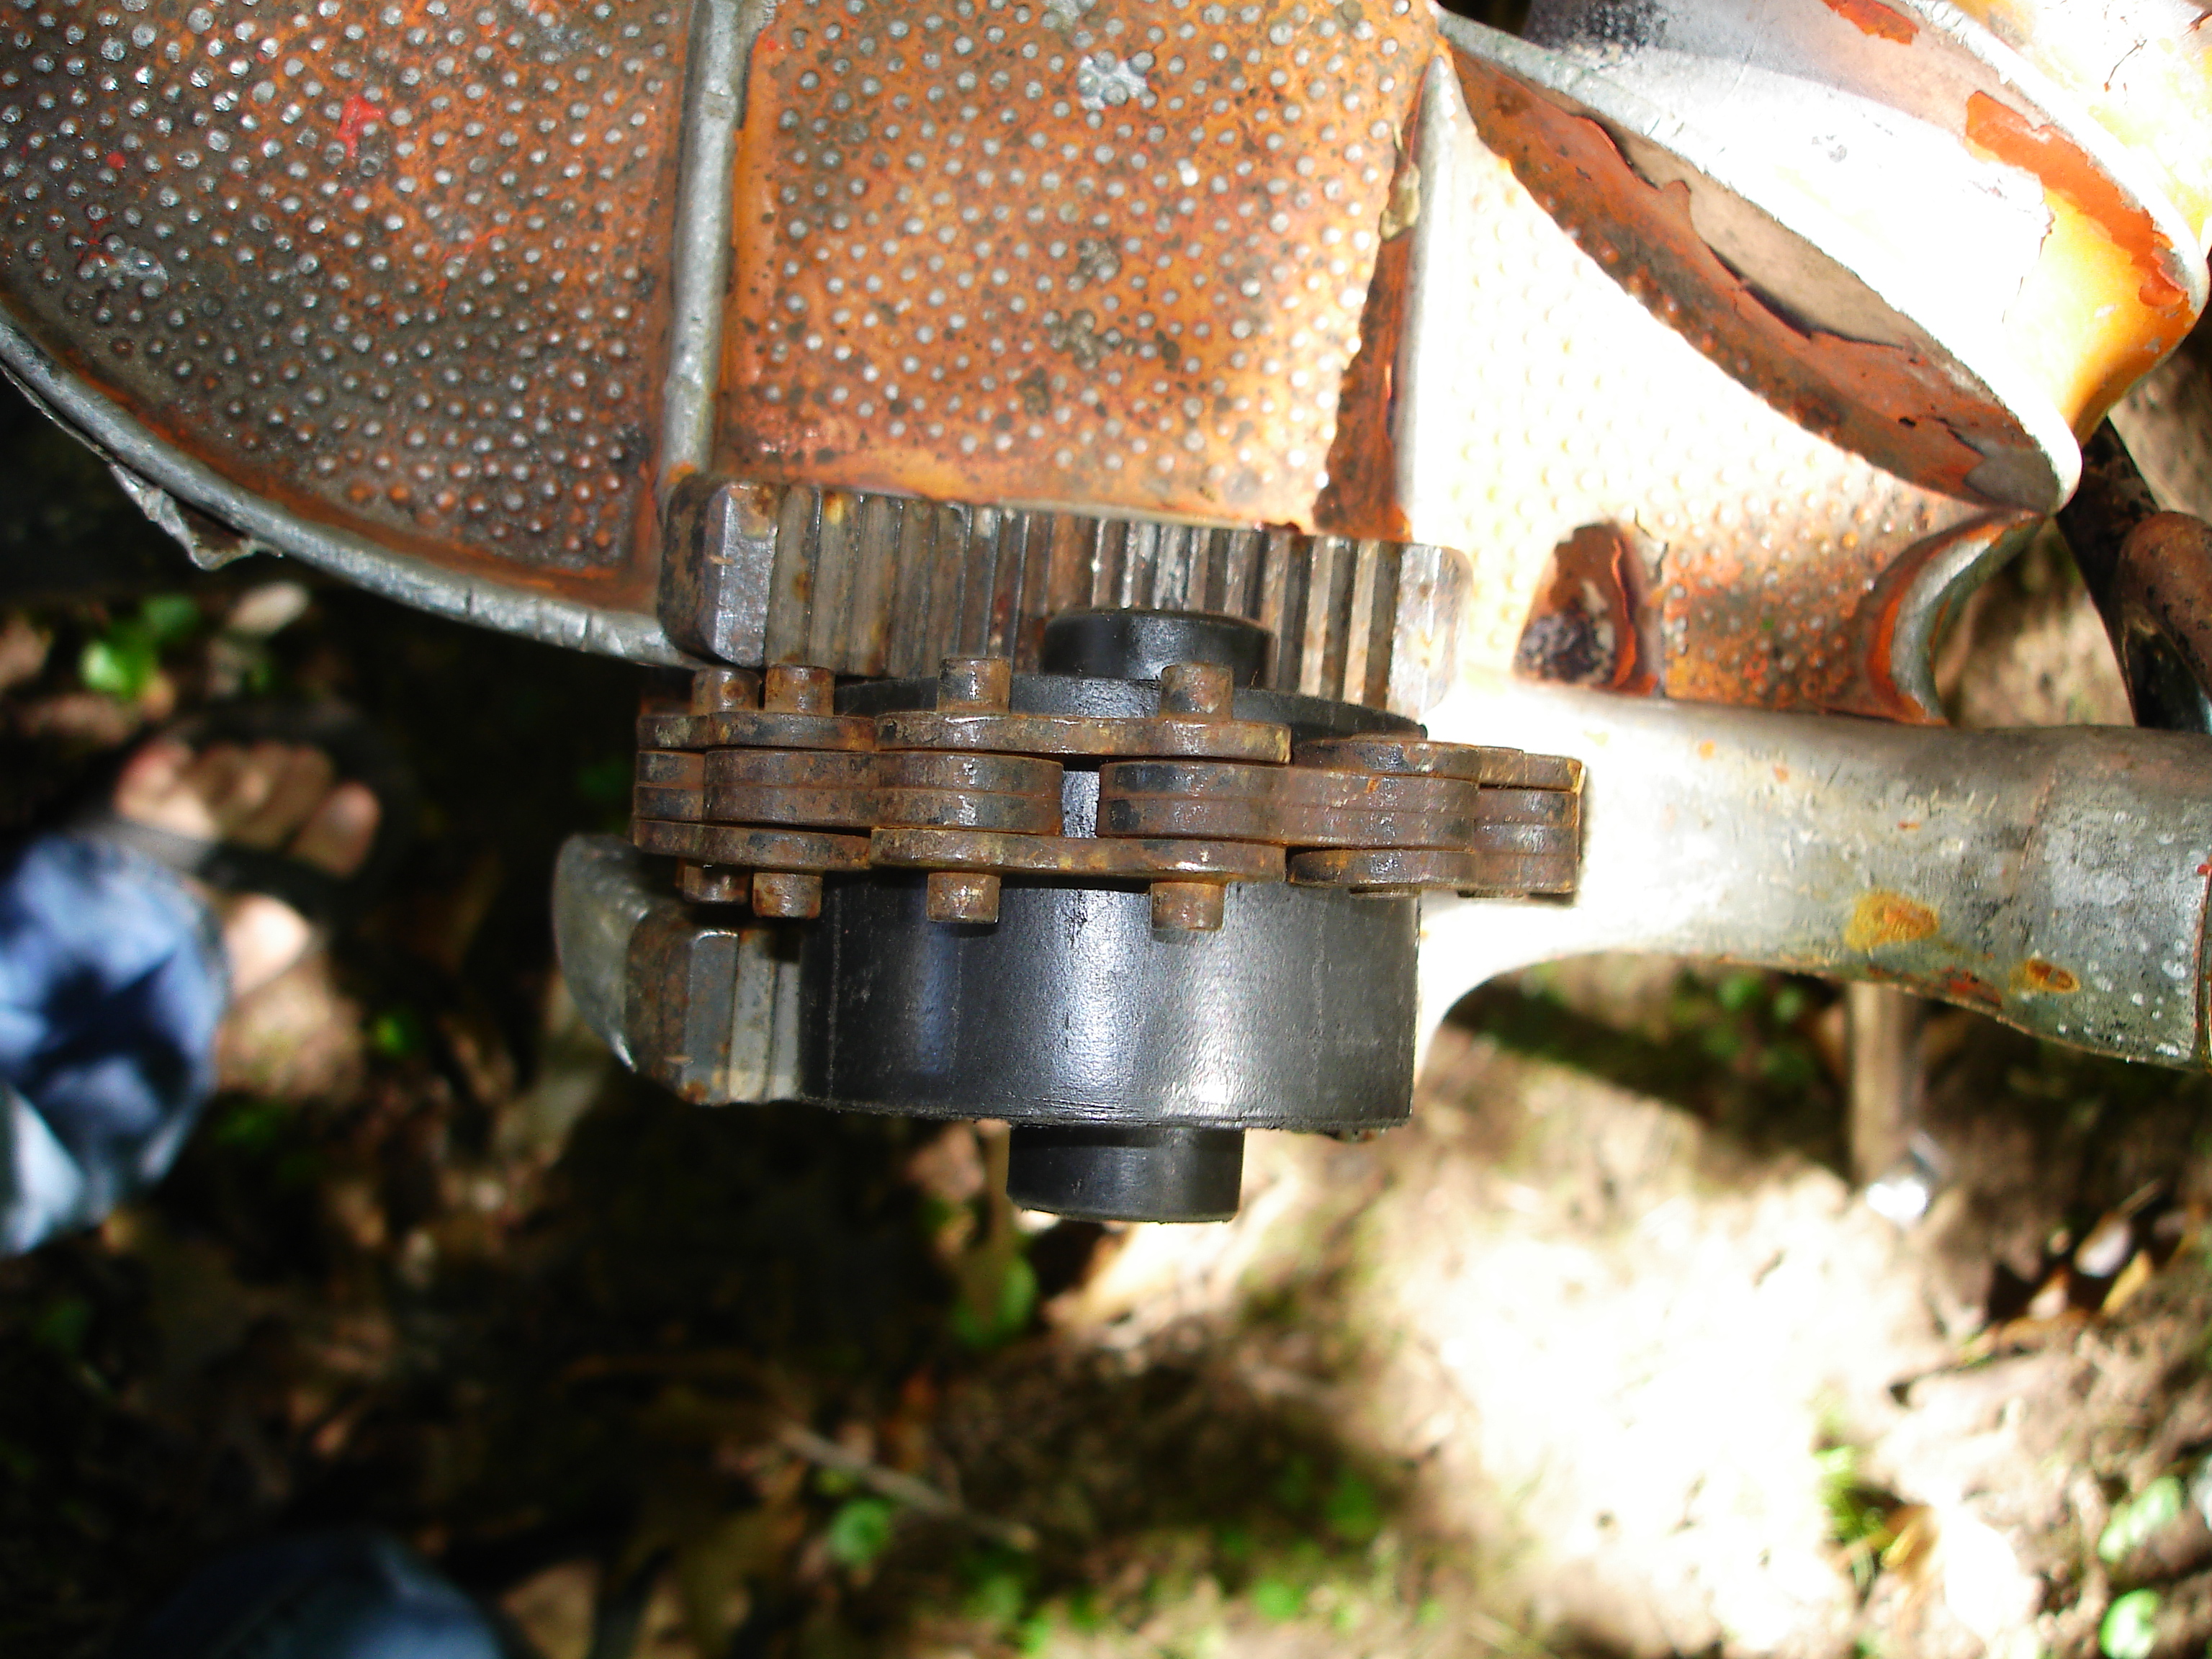
Here is the other side, notice how the bracket goes down…it attaches to the engine and then the transmission. This fix is so expensive at the dealer because this whole piece is replaced, not just the rubber…plus it is a real pain to get down to where it attaches. It is insane that this rubber bushing was not made as a replaceable part.
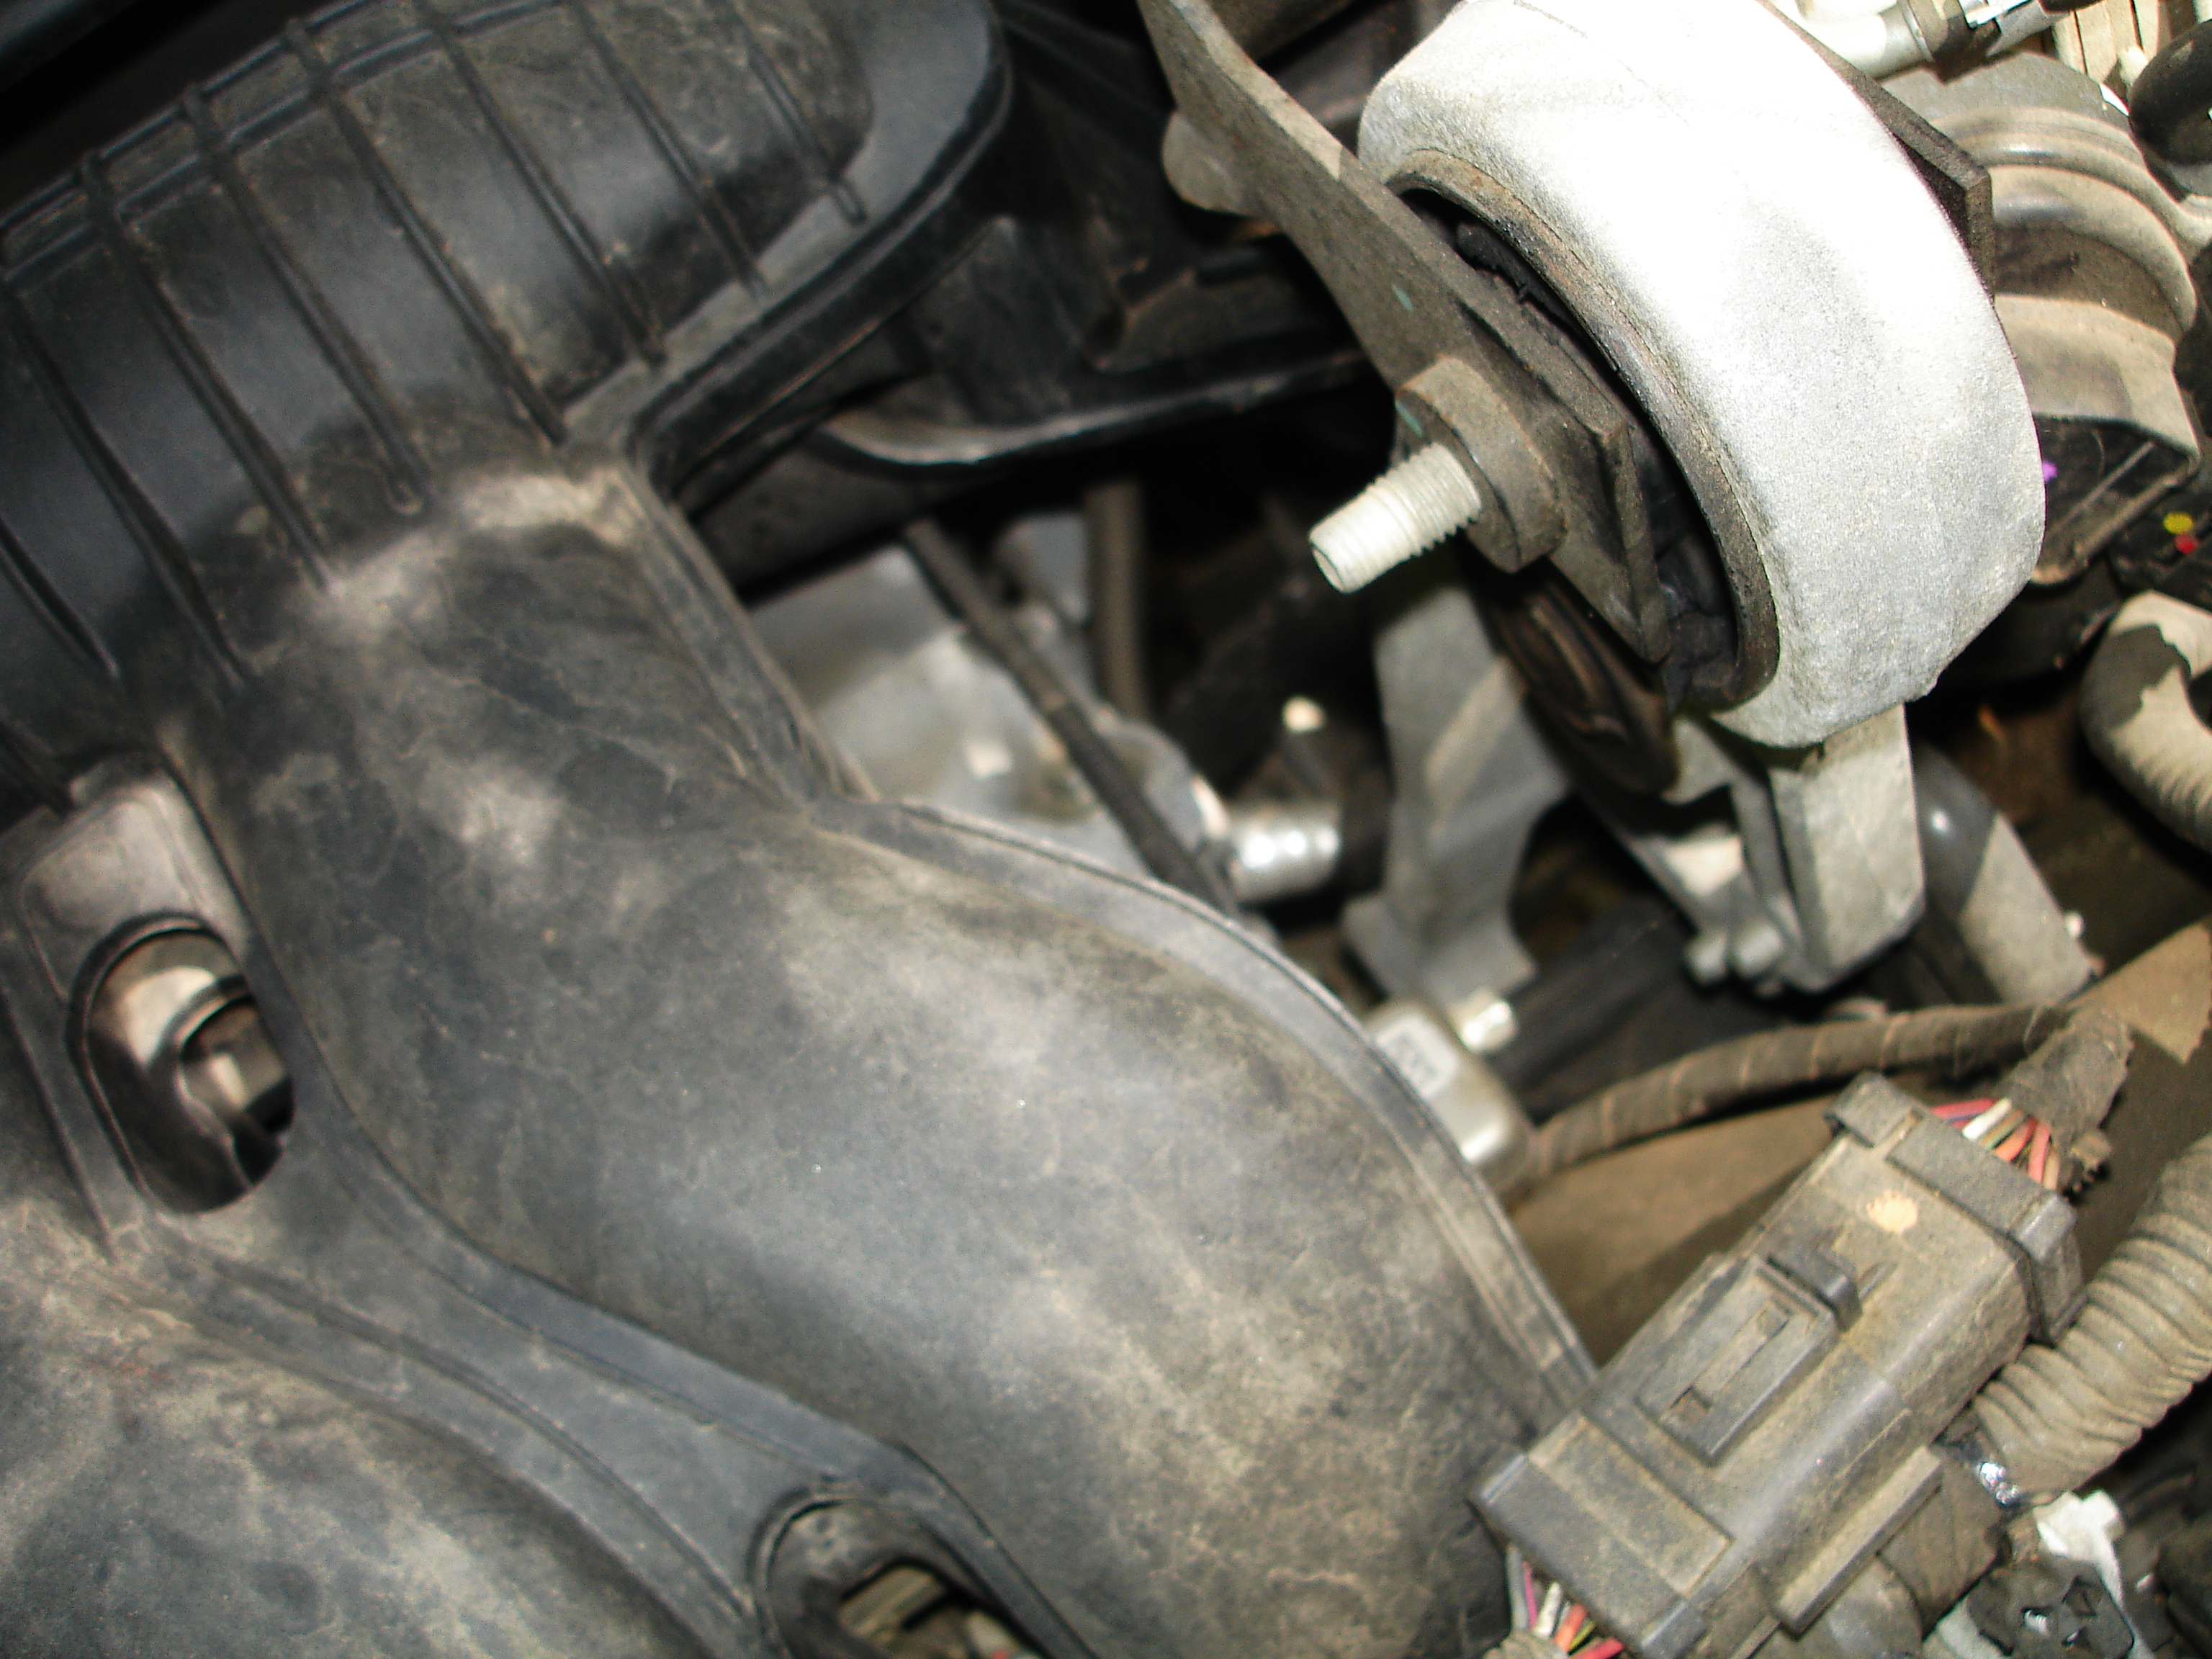
Notice two pictures above how the bracket that holds the bolt that goes through the bushing attaches to a stabilizer bar just in front of the firewall. While you might be able to get this fix done by just pushing the bracket out of the way…I found it was really easy to take the whole bar out…it is 4 easy to get to bolts, it takes about 2 minutes and makes it much simpler to get to everything. DO NOT try to take out the single bolt that holds the bracket to the bar (shown below) it sucks to get to to loosen and re-tighten (I tried)

Here are the bolts at the end of the bar…easy!
Pop that sucker out!

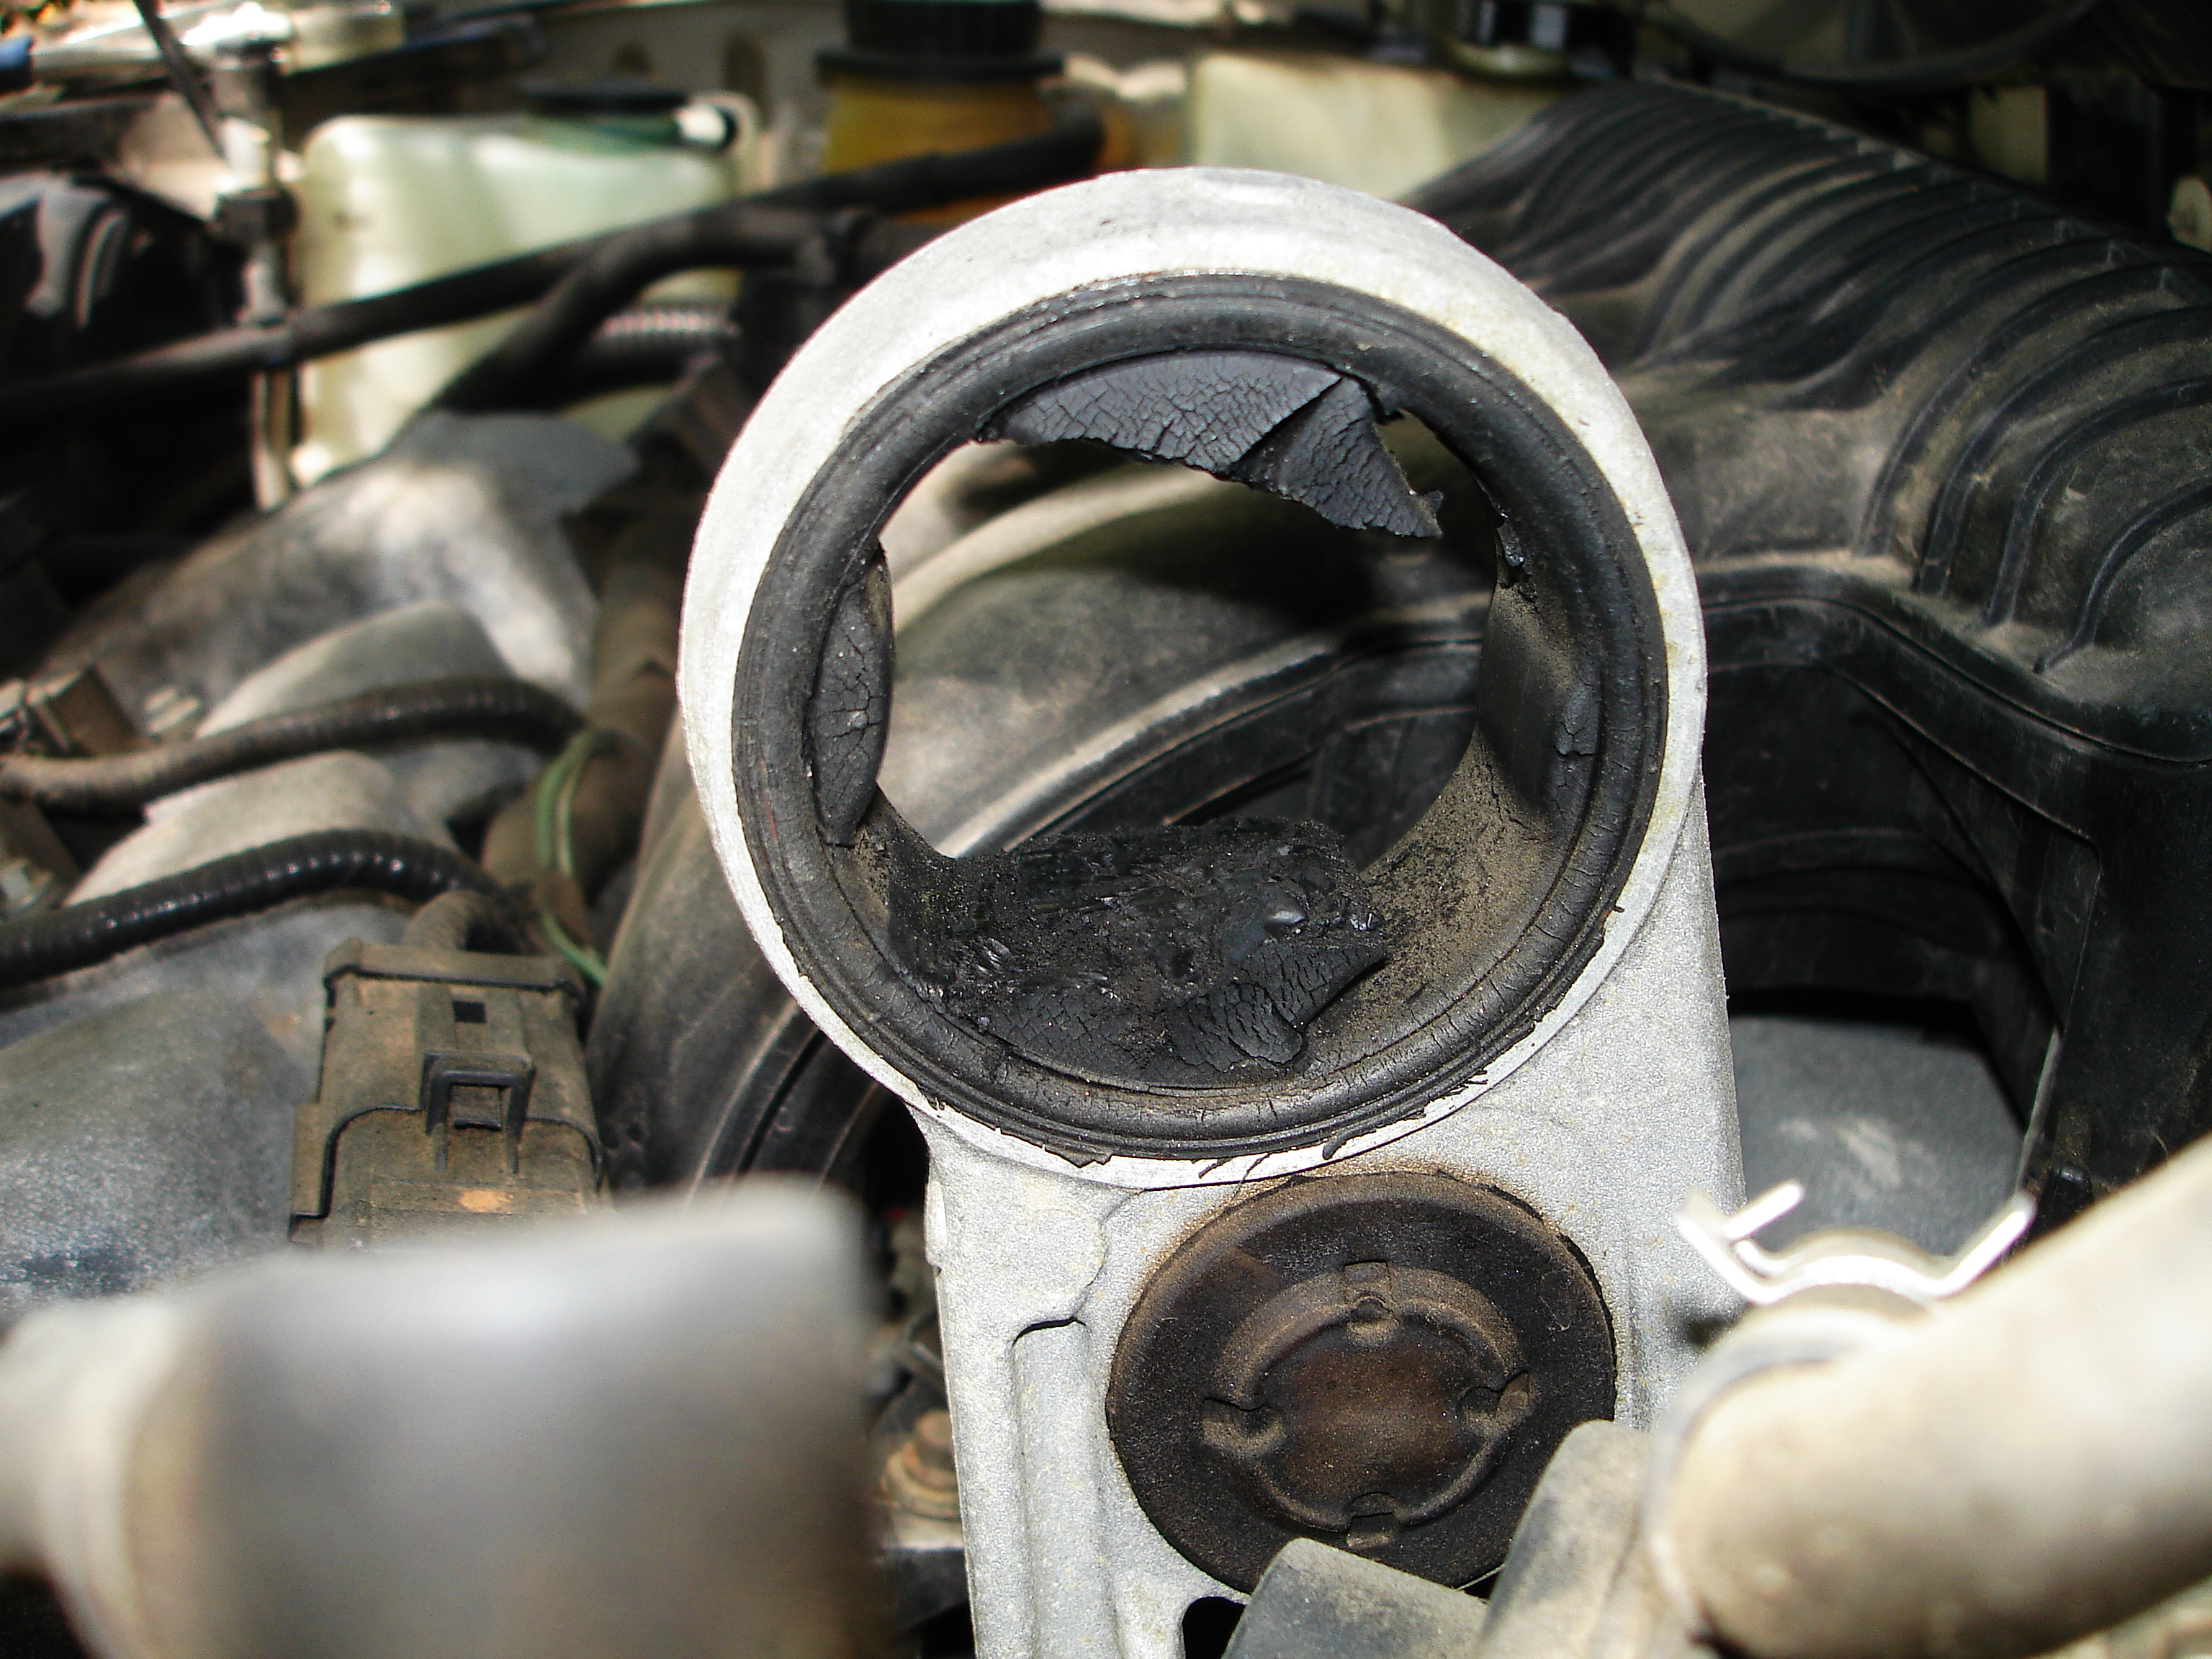
Ok, here is the old bushing. it is completely broken down. the center is not even attached, it was just held from falling out by the bracket we removed.

Ok, this is the most important process…the bushing will have a lot of rubber left in the hole. DO NOT COMPLETELY REMOVE THE RUBBER! This is important, if you totally clean the hole out your new part will not fit, the remaining rubber holds the new part in place. You do want to clean the hole up of big broken chunks, I used a razor knife. Be careful!
Here is what the hole looks like before any cleaning
Here is me cleaning with a razor knife

Here is the hole cleaned out, I probably could have trimmed a little more out but I wanted a really firm fit…it made it a little difficult to get the bushing in though…you do want to definitely leave the rubber “nubs” on the right and left in any case

Ok, almost there, now you have to get your part in. In the original post on the Freestyle Forum (link at top of page) I think the author said he used a mallet….there is NO WAY that would work with the amount of rubber I left in the hole, I used two metal plates and a large c-clamp…I also had to use a “cap” shown below to get the part centered exactly….you might not have to do that…try to hammer it in with a rubber mallet, maybe some dish soap or something might help it slide in too though I didn’t try that.
Below is the beginning of pushing the piece in place with two metal plates (you could use wood blocks or anything flat)

When I pushed in the part as much as I could, it wasn’t quite centered because it was hitting the plate on the far side….this probably would have worked but I wanted to get it perfect

I found a small aluminum cap that I could put over the entire metal hole and let the clamp push the bracket deeper into the hole in order to get it centered.


That worked! Note that the hole was so tight that my new bracket pushed out some of the rubber as it went through the hole.

Now, just put it back together and you are done!


Ok, let me know if you have any questions or if you come up with any tips or tricks to make this easier or more effective!

superb write-up, very detailed, thanks !
Thanks! I have a few more to come soon….have to fix the AC condenser valve…maybe some lower motor mounts…instrument cluster….ugh!
Thanks for the nice and simple step by step process with photographs. I have been needing to do this for a few months now.
Hope the replacement went well!
Saved atleast 400$ – time 1 hr&1/2 thanks
Great advice. Have you had any later problems with the new Volvo bushing sliding around inside the old Ford frame? Someone had suggested using high heat silicone to hold it in place.
I have not had any problems but I left a lot of the material from the old bushing intact, I only cut out the stuff that was damaged. Because of the extra material the bushing was hard to press in, there would have been no way to do it without the C-clamps or some other mechanical assistance…I dont think it would have gone in with a hammer even. If a lot of the old rubber was removed I could see needing silicon but I think I would worry about it holding up to lateral forces.
I wish I would have found this site before I bought the bushing. I paid $85 for the bushing and got it in however now it sticks out about 1/8″.. any suggestions on how to get it in the mount all the way? We have tried hammering it in and it won’t budge.
You have to use a C-clamp or 2 to move it around, I had the problem with it not being centered, in the writeup you will see a little aluminum cup that I had to use so that I could center it just right, it allowed it to push past flush on the side it was being pushed towards to split that 1/8″ into 1/16″ or less on both sides.
Hi was your free style making noise because of this when it was on park or neutral because I have the bushings gone as well and when on drive it makes no noise but on park it makes noise and it’s the FWD/
I did this last week on my 2006 500. It worked like a charm! I used 3 smaller c-clamps to push in the bushing. Not the hardest thing I’ve ever done, but not the easiest either. Thanks for the nice website!!!
Hi was your free style making noise because of this when it was on park or neutral because I have the bushings gone as well and when on drive it makes no noise but on park it makes noise and it’s the FWD/
The repair went as smooth as you said. I had my 15 year old son out there helping me. I was a little concerned when I received the part, it looked too small, but leaving the rubber nubs is very important and it fit nice and snug. Firestone wanted close to $600 for the repair, the part I found with shipping was about $16. AWESOME!! Thanks!!
Just bought the part today for my 2006 Freestyle from Amazon for 8 bucks…had the machine shop at my school slice the ends off and will be installing the part this weekend. Is there any noticeable difference in ride quality or engine vibration? just curious. and thanks!!
and definitely let us know about the instrument cluster…my speedometer works intermittently..thanks!
Sorry for the year delay! But I took the instrument cluster out and had the solder joints on the back cleaned and found one that was kind of cracked…re-did that joint and everything has worked fine since. Prior to that it had gotten where everything cut off every few minutes. Sorry not very specific but check out the myfreestyle forum I link to, there is info there that might help.
Well, I just did it! This seems to have fixed the problem and I have saved about $490 compared to Ford dealer. I have a neighbor who owns a body shop and he was able to cut off the metal nubs for me as I don’t really have any tools that would do it. It was very straight forward from there. The only issue I ran into was finding something around the house that was the right size and hardness to use as the “aluminum cap”. Finally I got it right; overall it was a fairly simple procedure. Great write-up, thanks for the advice and detailed pics!!!
Thanks for the excellent write up, I completed this minor but very effective repair today and saved a substantial sum of money.
My wife is now out buying new shoes with that money…..sheesh !
What about using this part:
http://www.ebay.com/itm/Ford-Five-Hundred-Freestyle-MotorKing-Engine-Bracket-Mount-Bushing-Kit-FM03-AT-/140976254607#vi-ilComp
thanks for the tip about the four bolts
I have the same problem with my freestyle 2005, but I don’t know where to get the same modified part. how can I get it ? Thank you.
I actually did this (from the video referenced) about 4 years ago or so (I am the sole owner of my 2005) and it worked great! However, its time to do it again…I think maybe it has to do with living in Colorado and the dry air. But, I’ll definitely do this again, the dealership wanted $500 for it last time.
This was a easy fix to an expensive repair. Your instructions were a peach. in less than 30 min we had it all done and spent less than $20 with the express shipping. Thank you again for your post.
Now how do you suggest I fix the low idle that causes sporadic stalling? Plugs? I can get to 3 of them, the rest are buried under the dash.
Thanks a TON for the information,I am a woman and I am always looking for ways to fix my rides without all the bullshuit cost attached to the garages. Worked amazingly,the only yhing I did different after trimming out some of the old rubber and installing the new piece I just put vaseline on and hand pushed it in. So try a little vaseline 🙂
Awesome, glad it helped. I thought about some lubricant but I was afraid the finished product might move. I would imagine it will “dry up” at some point soon in the heat of the engine compartment though.
If you get the 07 freestyle mount do you need to leave rubber in?
I just bought a 2006 Ford freestyle SE.from a local dealer got a great deal for it.I notice that every time I was taking off from a complete stop and start to go again I heard a thump. So I assume it was a mount so I open hood and did the test of shifting gears and the whole engine was moving.At that point I google and found the Myfordfreestyle forum and saw your forum as well.Great directions the only thing that was hard was cutting the metal ends. So I took it to my local Home Depot and they cut it for me. This whole cost for me 37.00..I bought my part from NAPA for 20.00 and got it the same day. This save over 300.00. Thanks for sharing
Awesome!